Follow the ideal steps to make your website powered by WordPress faster
Getting nginx and php 7 to work can be a real nightmare. So I will explain easy steps how to create blazing fast WordPress site. First of all, you need to go to Vultr.
This tutorial will show you how to get started with and set up a server on Vultr, which offers a variety of SSD cloud servers for your WordPress site for a price as shared hosting.
Choice location and select your server’s operating system Ubuntu 16.04.

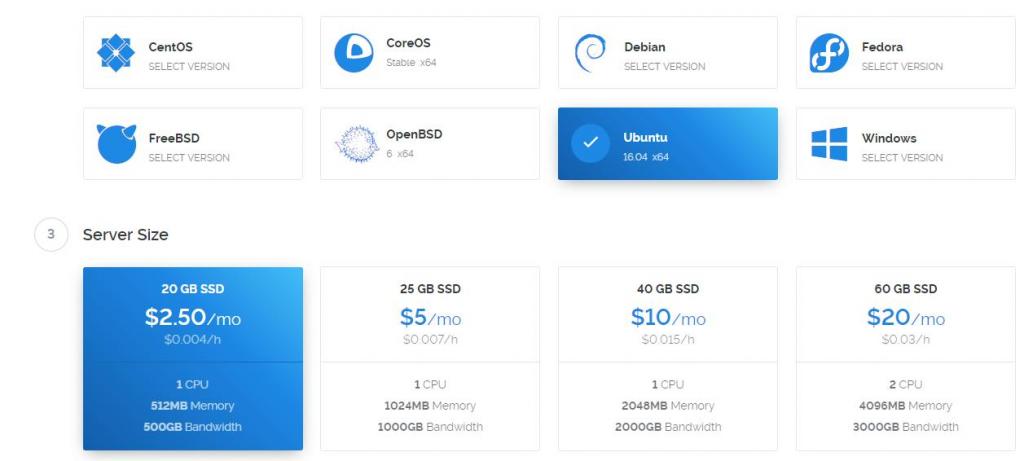
- Vultr provides high-performance SSD cloud servers that boasts a global footprint. It aims to create the most reliable and efficient service for launching a blazing fast SSD cloud server.
Second, access to new server using ssh. Here is a guide how to connect via putty.
Than Install NGINX, MySQL, Postfix, PHP 7 and dependencies with a single command. So we use EasyEngine
wget -qO ee rt.cx/ee && sudo bash ee # install easyengine
sudo ee site create yourwebsitename.com –w3tc # install wordpress on yourwebsitename.com with W3 Total Cache.
So now we created WordPress site, so we can easy point our domain with new server.
Here’s a basic rundown of the required steps to get your website online:
- register your prefered domain with GoDaddy
- add the domain to CloudFlare
- change the name servers of your domain
- change your DNS record to the IP of your server
“What is CloudFlare and why do I need it?“, you may ask. Well, CloudFlare offers a lot of services, you can read about them at their homepage or on Wikipedia, I’m not going to repeat that, but basically, they speed up your site loading by caching (the data [images, JavaScript, CSS, etc] is minifyed and gziped and stored in a worldwide content delivery system), enhance the security and the best of all: they offer SSL encryption for your domain. All for free, if you have a small site. All you have to do to get all those goodies is to change the name servers of your domain.
Than, go to the websites panel, put your domain into the text field and click on “Add website”. This may take a few moments to complete, so be patient. When the process completed, click on “Continue setup”.
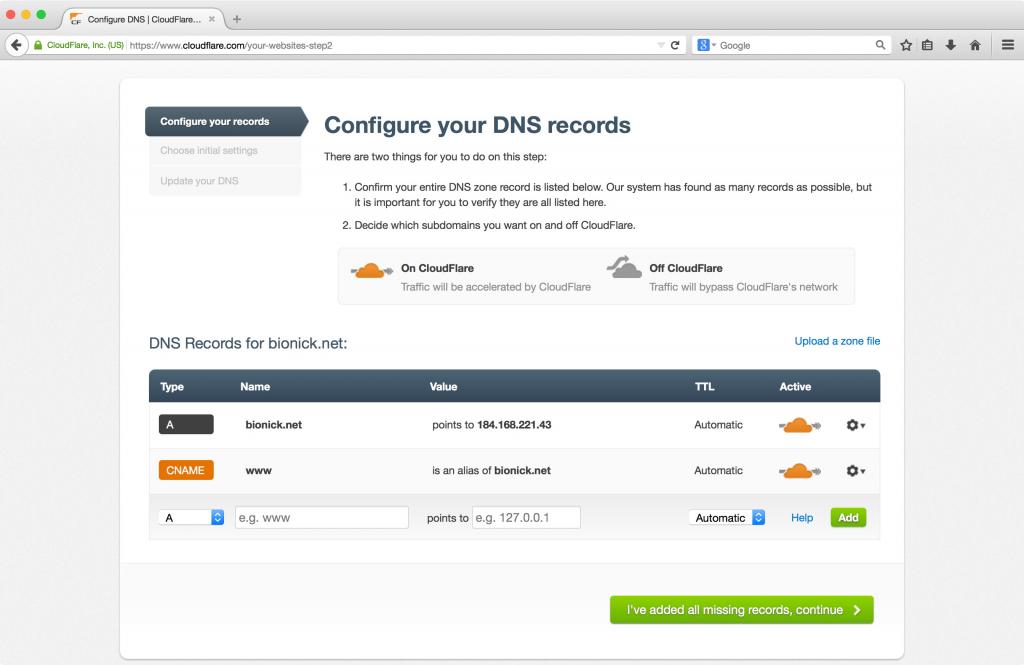
In the next step, you will have to configure the DNS records for your domain. This list is filled with the current DNS records of the domain and contains a lot of garbage. For now, you’ll only need two records, which should already be in the list, first an “A” record with your domain name pointing to the IP of your server as value.
Add your IP address from vultr droplet as A record here.
Example:
Set up the options for your domain in the next screen. For now, you can leave the options at their default values. Continue to the final screen, where you’ll see the old and new name servers for your domain. You’ll need to change the name servers at the domain registrar, so don’t close this window yet, you’ll need those information in the next step.

On the domain details page, click on “Manage” beneath name server. A popup with the name server settings open. Click on “Custom”, “Add Nameserver” and enter the address of both name servers, which you received from CloudFlare. Save the changes and you’re done.
That’s was the easy part! The Not-so-easy Part is Creating a high traffic site, big enough to crash Nginx 🙂
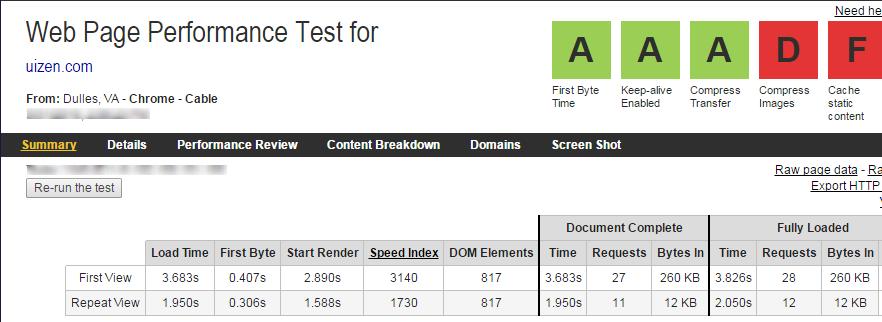
We can see a clear difference between the same WordPress site running on PHP 5.6 and the one on PHP 7 here.

Webpagespeed test:
PHP 7 with Nginx

PHP 5.6 with Nginx


